Transitions, Animations, and Images oh my!
Improving the User Experience one feature at a time.

Fade In
I received some feedback on my portfolio site that some of the transitions were too sharp and sudden. After trying to implement some pretty nasty CSS, I stumbled upon react-fade-in. It was surprisingly simple to implement.
I installed it: npm install react-fade-in,
imported it: import FadeIn from 'react-fade-in';,
and wrapped it around the elements that I wanted to have gradually appear:
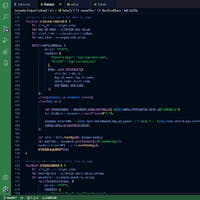
return(
        <div className={classes.root}>
            <FadeIn transitionDuration='4000'>
                <Box
                    padding='40px'
                    borderRadius= '30px'
                    alignItems="center"
                    maxWidth='sm'
                    align='center'
                >
                    <Typography variant='h2' color='primary' > COMING SOON! </Typography>
                </Box>
            </FadeIn>
        </div>
    )
}
There are numerous props you can pass FadeIn; I used transitionDuration to fine-tune how quickly the element appeared. delay, visible, and onComplete also look handy. I will definitely be utilizing this component in future projects; it's nearly effortless to implement and improves the user experience.
React Loadingg
I also wanted to add a loading state to my site and use a cool loading animation; the background image loaded slowly on the initial page load. Seeing one element load at a time definitely affected the user's first impression.
First, I found a loading animation component library that was easy to use but had a big return (I like good deals). I installed it: npm install react-loadingg, and imported my chosen animation component: import { NineCellLoading } from 'react-loadingg';
Then, I had to set up loading state in my App component:
const [loading, setLoading] = useState(true);
I used the useEffect hook to set my loading state to false once the App component mounted. useEffect lets you specify the conditions to trigger it within a dependency array. It will watch this dependency and run every time there is a change to it. By providing an empty dependency array, I tell useEffect only to run one time. I only need it to set the loading state on the initial page load.
I also set a timeout so that the loading animation would stay on the screen for three seconds, even if the component took less time than that to mount. Otherwise, it just flashed for a moment on the screen and looked like something was broken.
    useEffect(() => {
      setTimeout(() => {
         setLoading(!loading);
       }, 3000);
     },[]);
Finally, I used a ternary statement to tell my application to load the animation if the component loading state was true, otherwise to load the page content.
!!loading ? <NineCellLoading color='#E0AE8E'/> : <div> Page Content Here </div>
You can set the color, speed, size, and style of the animation. With just a few keystrokes, it matched my theme colors. Pretty nifty!
Compressor
I was pretty happy with the progress I had made by this point, but I was having some trouble with the initial render of the background image taking too long. On some devices, the state was changing before the background image was completely loaded. I thought about increasing the setTimer function delay, but then figured users might lose interest if the page took longer than three seconds to load.
I did some investigating and discovered this handy tool for compressing images to help them load faster. You drag and drop your images, wait for them to compress, download the smaller files and replace the large image files in your image folder with the smaller ones.
To see it all in action, visit my portfolio; I'd love to hear any feedback you have!